
Posted in Blog, Create, Facilitation, Innovation, Virtual Facilitation by Jo North
How to Facilitate Creative Problem Solving Workshops
This article gives you a comprehensive guide to creative problem solving, what it is and a brief history. It also covers how creative problem solving works, with a step-by-step guide to show you how to solve challenging opportunities and problems in your own organization through fresh approaches, and how to facilitate a creative problem solving workshop.
Here are The Big Bang Partnership we are expert facilitators of creative problem solving workshops. Please do comment or email us if you would like any further tips or advice, or if you’d like to explore having us design and facilitate a workshop for you.
What is Creative Problem Solving?
Creative problem solving, sometimes abbreviated to CPS, is a step-by-step process designed to spark creative thinking and innovative solutions for purposeful change.
The creative problem solving process is at the root of other contemporary creativity and innovation processes, such as innovation sprints and design sprints or design thinking. These methods have adapted and repackaged the fundamental principles of creative problem solving.
Creative Problem Solving Definition
Here are definitions of each component of the term creative problem solving process:
- Creative – Production of new and useful ideas or options.
- Problem – A gap between what you have and what you want.
- Solving – Taking action.
- Process – Steps; a method of doing something.
Source: Creative Leadership: Skills that Drive Change Puccio, Murdock, Mance (2007)
The definition of creative problem solving (CPS) is that it’s a way of solving challenges or opportunities when the usual ways of thinking have not worked.
The creative problem solving process encourages people to find fresh perspectives and come up with novel solutions. This means that they can create a plan to overcome obstacles and reach their goals by combining problem solving and creative thinking skills in one process.
Using creative problem-solving removes the haphazard way in which most organizations approach challenges and increases the probability of a successful solution that all stakeholders support.
For an overview of the history of the creative problem solving process, have a read of my article here.
Creative Problems to Solve
Just a few examples of creative problems to solve using the creative problem solving process are:
- Shaping a strategy for your organization
- Developing or improving a new product or service
- Creating a new marketing campaign
- Bringing diverse stakeholders together to collaborate on a joint plan
- Formulating work-winning solutions for new business proposals, bids or tenders
- Working on a more sustainable business model
- Finding eco-innovation solutions
- Social or community innovation
- Co-creation leading to co-production
Messy, Wicked and Tame Problems
If your problem or challenge is ‘messy’ or ‘wicked’, using the creative problem solving process is an excellent method for getting key stakeholders together to work on it collaboratively. The creative problem solving process will help you to make progress towards improving elements of your challenge.

Messy Problems
In the field of innovation, a messy problem is made up of clusters of interrelated or interdependent problems, or systems of problems. For example, the problems of unemployment in a community, the culture in a workplace or how to reach new markets are likely to be caused by multiple factors.
It’s important to deconstruct messy problems and solve each key problem area. The creative problem solving process provides a valuable method of doing so.
Wicked Problems
Design theorists Horst Rittel and Melvin Webber introduced the term “wicked problem” in 1973 to describe the complexities of resolving planning and social policy problems.
Wicked problems are challenges that have unclear aims and solutions. They are often challenges that keep changing and evolving. Some examples of current wicked problems are tackling climate change, obesity, hunger, poverty and more.
Tame Problems
‘Tame’ problems are those which have a straightforward solution and can be solved through logic and existing know-how. There is little value in using the creative problem solving process to solve tame problems.
Creative Problem Solving Skills
Specific thinking skills are essential to various aspects of the creative problem solving process. They include both cognitive (or intellectual) skills and affective (or attitudinal, motivational) skills.
There are also three overarching affective skills that are needed throughout the entire creative problem solving Process. These creative problem solving skills are:
- Openness to new things, meaning the ability to entertain ideas that at first seem outlandish and risky
- Tolerance for ambiguity, which is the ability to deal with uncertainty without leaping to conclusions
- Tolerance for complexity, defined as being able to stay open and persevere without being overwhelmed by large amounts of information, interrelated and complex issues and competing perspectives
They show an individual’s readiness to participate in creative problem solving activities.
Creative Problem Solving and Critical Thinking
Critical thinking involves reflecting analytically and more objectively on your learning experiences and working processes. Based on your reflection, you can identify opportunities for improvement and make more effective decisions.
Critical thinking is an important skill when using the creative problem solving process because it will drive you to seek clarity, accuracy, relevance and evidence throughout.
Strategies for Creative Problem Solving
One of the most successful strategies for creative problem solving process is to get a multi-disciplinary team of internal, and sometimes external, stakeholders together for a creative problem solving workshop. Here is a process that you can use to facilitate your own creative problem solving workshop.
How to Facilitate a Creative Problem Solving Workshop
Challenge or Problem Statement
The first, potentially most important, stage of the creative problem solving process is to create a challenge statement or problem statement. This means clearly defining the problem that you want to work on.
A challenge or problem statement is usually a sentence or two that explains the problem that you want to address through your creative problem solving workshop.
How might we…?
A good way of expressing your challenge is to use the starting phrase “How might we …?” to produce a question that will form the core of your creative problem solving mission. Framing your problem as a question in this way helps people to begin to think about possibilities and gives scope for experimentation and ideation.
Why it’s important to have a clear problem statement
Defining your problem or challenge statement matters because it will give you and your colleagues clarity from the outset and set out a specific mission for your collaborative working.
If you begin the creative problem solving process without a clear problem or challenge statement, you’ll likely experience misunderstanding and misalignment, and need to retrace your steps. Taking time to get your challenge or problem statement right is time well spent. You can download my free resources on how to create a challenge statement for innovation and growth here.
Creative Problem Solving Process
Once you have defined your creative problem to solve, and the strategies for creative problem solving that you want to use, the next steps are to work through each stage of the creative problem solving process. You can do this on your own, with your team, working cross-functionally with people from across your organization and with external stakeholders. For every step in the creative problem solving process there is a myriad of different techniques and activities that you can use. You could literally run scores of creative problem solving workshops and never have to repeat the same format or techniques! The creative problem solving techniques that I’m sharing here are just a few examples to get you started.
Creative Problem Solving Workshop Agenda
To make the creative problem solving process more accessible to more people, I’ve built on the work by Osborn, Parnes, Puccio and others, to create our Creative Problem Solving Workshop Journey Approach that you can use and adapt to work on literally any problem or challenge statement that you have. I’ve used it in sectors as diverse as nuclear engineering, digital and tech, utilities, local government, retail and e-ecommerce, transport, financial services, not-for-profit and many, many more.
Every single workshop we design for our clients is unique, and our starting point is always our ‘go-to’ outline agenda that we can use to save ourselves time and know that our sessions are well-designed and put together.
The timings are just my suggestion, so please do change them to suit the specific needs of your creative problem-solving workshop.
All the activities I suggest are presented for in-person workshops, and they can be adapted super-easily for virtual workshops, using and online whiteboard such as Miro.
Keep the activities for each agenda item long enough to allow people to get into it, but not too long. You want the sessions to feel appropriately pacey, active and engaging. Activities that are allowed to go on too long drag and sap creative energy.
Outline Agenda
Welcome and Warm-up 0900-0930
Where do we want to be, and why? 0930-1000
Where are we today? 1000-1030
Break 1030-1045
Why are we where we are today? 1045-1115
Moving forward – Idea generation 1115-1230
Lunch 1230-1315
Energiser 1315-1330
Moving forward – Idea development 1330-1415
Break 1415-1445
Action Planning 1445-1530
Review, feedback and close 1530-1600
Here is the agenda with more detail, and suggested activities for each item.
Detailed Creative Problem Solving Workshop Agenda
Welcome and Warm-up
The welcome and warm-up session is important because:
- For groups who don’t know each other, it’s essential that people introduce themselves and start to get to know who everyone is.
- This session also helps people to transition from their other work and activities to focusing on the purpose of the day.
- It sets the tone for the rest of the event.
Items to include in the welcome and warm-up are:
- Welcome to the event.
- Thank people for taking the time.
- The purpose and objectives of the event, and an overview of the agenda for the day. Introduce your problem or challenge statement.
- Ground rules in terms of phone usage, breaks, confidentiality.
It’s good to have the agenda and ground rules visible so that everyone can see them throughout the day, and don’t forget to inform people of any fire evacuation instructions that need to be shared, and information on refreshments, washrooms and so on.
Remember to introduce yourself and say a little bit about you as the workshop leader, keeping it brief.
Things to look out for are:
- How people are feeling – energy, interest, sociability, nervousness and so on.
- Cliques or groups of people who choose to sit together. Make a mental note to move the groups around for different activities so that people get to work with as many different people as possible to stimulate thinking and make new connections.
If you’d like some ideas for icebreakers and warmups, there are lots to choose from in these articles:
Icebreakers for online meetings
Creative warmups and energizers that you can do outside
Where do we want to be, and why?
The first session in your creative problem-solving workshop aims to start with thinking about what the group wants to achieve in the future. As well as setting the direction for your problem statement for the day, it allows delegates to stretch their thinking before they become too embedded in working through their current position, issues and concerns. It is positive and motivational to identify those aspirations that everyone shares, even if the reasons or details differ from person to person.
Suggested creative problem-solving techniques for Where do we want to be, and why?
Horizon Scanning
Brief the delegates as follows:
- Use the resources / idea generators provided [e.g. magazines, newspapers, scissors, glue, stickers, glitter, any other craft items you like, flip chart paper) and your own thoughts.
- Identify a range of themes that are relevant to the challenge statement you are working on in this workshop. Feel free to use your imagination and be creative!
- For each theme, explain why it is important to the challenge statement.
This activity can be adapted for virtual workshops using online whiteboards such as Miro.
WIFI – Wouldn’t It Be Fantastic If…
This creative problem solving technique opens up delegates’ thinking and frames challenges as a positive and motivational possibility.
Ask delegates to spend just a few minutes completing the following statement as many times as they can with real items relating to their challenge for the workshop:
Wouldn’t it be fantastic if… (‘wifi’)
Delegates should then select the wibfi statements that would make the most material difference to their challenge.
They might have a couple or more of connected statements that they want to combine into a new one. If so, that’s completely fine.
Ask them to write their final statement on a flipchart.
Where are we today?
After establishing the vision for the future, it is important to gain a collective view on the starting point, and gain different, individual perspectives on the current position.
Suggested creative techniques for Where are we today?
Rich pictures
Rich pictures provide a useful way of capturing the elements of messy, unstructured situations and ambiguous and complex problems.
A rich picture is intended to portray the unstructured situation that the delegates are working with.
Brief the activity in as follows, noting that they can assist in the construction of a rich picture which should initially be rich in content, but the meaning of which may not be initially apparent.
- Ask delegates to consider the messy problem or situation that they are facing and dump all the elements of the scenario they are viewing in an unstructured manner using symbols and doodles.
- Ask them to look for elements of structure such as buildings and so on, and elements of process such as things in a state of change. They may see ways in which the structure and process interact as they use hard factual data and soft subjective information in the picture.
- If appropriate, ask the delegates to include themselves in the picture as participants or observers, or both, and to give the rich picture meaningful and descriptive title.
- Without explanation, one group’s rich picture is often a mystery to another observer, so ask small working groups to talk through the, to the wider group. It is not meant to be a work of art but a working tool to assist your delegates in understanding an unstructured problem or change scenario.
Out of the box
Representing a problem in any new medium can help bring greater understanding and provide a rich vehicle for discussion and idea generation.
Collect a range of (clean and safe!) junk materials, such as cardboard boxes, empty packets, old magazines and newspapers etc.
You will also need some string, glue and tape.
Ask delegates to use the items around them to create (a) 3D vision(s) of the solution(s) to their challenge.
This provides a different perspective, as well as getting everyone engaged, active and conversing.
Why are we here?
This stage of the away day focuses on helping the group to understand the critical success factors that have driven positive outcomes, as well as any constraints, perceived or real, that are getting in the way of future progress. It identifies items that can be explored further in the idea generation, selection and development stages.
Suggested creative techniques for Why are we here?
Ishikawa Fish Bone
The fishbone diagram was developed by Professor Ishikawa of the University of Tokyo. It can encourage development of a comprehensive and balanced picture, involving everyone, keeping everyone on track, discouraging partial or premature solutions, and showing the relative importance and interrelationships between different parts of the challenge.

Ask the delegates to write their problem statement to the fish bone template, like the example shown here.
Then ask them to identify the major categories of causes of the problem. If they are stuck on this, suggest some generic categories to get them going, such as:
- Processes
- Technology
- People
- Materials
Delegates should then write the categories of causes as branches from the main arrow.
Next, they will identify all the possible causes of the problem, asking: “Why does this happen?”
As each idea is given, one of the delegates in each group writes it as a branch from the appropriate category. Causes can be written in several places if they relate to several categories.
Again, get the delegates to ask: “why does this happen?” about each cause, and write sub–causes branching off the causes.
If you have time, ask the delegates to carry on asking “Why?” and generating deeper levels of causes.
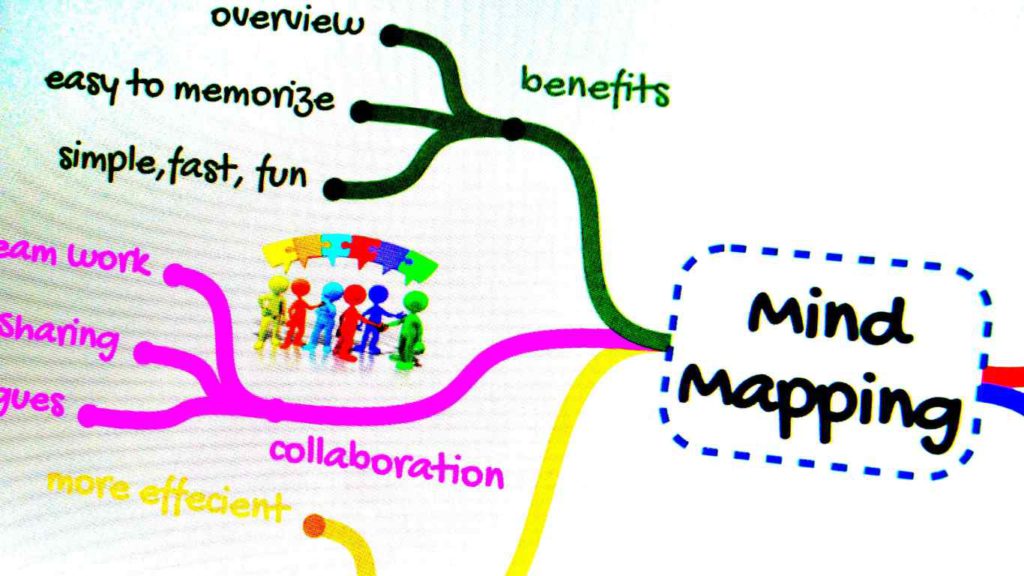
Mind mapping
The term mind mapping was devised by Tony Buzan for the representation of ideas, notes, information and so on in radial tree diagrams, sometimes also called spider diagrams.
These are now very widely used.
To brief in the mind map technique, the instructions below are usually best communicated via a quick demonstration by the facilitator, using an everyday, fun topic and asking delegates to shout out ideas for you to capture.
How to mind map:
- Ask delegates to turn their paper to landscape format and write a brief title for the overall topic in the middle of the page.
- For each major subtopic or cluster of materials ask them to start a new major branch from the central topic and label it.
- Continue in this way for ever finer sub-branches.
- Delegates may find that they want to put an item in more than one place. They could just copy it into each place or they could just draw a line to show the connections.
- Encourage delegates to use colour, doodles and to have fun with their mind map. This stimulates more right brain, creative thinking.
Moving forward – Idea generation
The next sessions are all about coming up with ideas, potential solutions to get from your starting position to the vision for the future that you all created earlier.
I recommend that you use at least two, or preferably all three of the idea generation techniques I have provided here because if you only use one, you are more likely to only get the most obvious, top of mind ideas from your team.
By looking at your challenge or opportunity from different perspectives using a range of techniques, you are more likely to create greater diversity of ideas.
Clustering
This technique is really good for almost any subject, and especially…
…getting input from everyone. The noisy ones have much less opportunity to dominate!
…getting all the thoughts that people have out of their heads and onto paper.
…getting you started. This is a really accessible technique that is easy to run.
…getting people talking and engaged.
You will need plenty of sticky notes and pens.
Clustering with sticky notes – step-by-step guide
- Ask people to focus on the challenge that is the subject of the session.
- Let people know that the activity has a couple of key stages and that you will explain each as you go along. Then explain and demonstrate the process as follows.
- Each person is to work individually at first. They will take a pile of post-it notes and a pen, and get as many items down on the post-it notes as they can, writing only one item on each post-it note so that each person has a pile of written notes in front of them (12-15 each would be great).
- Say to the group that if they think they have finished, it probably is just a mental pause. The best thing for them to do is to look out of the window or move around briefly (but not look at their phones, laptop or disturb other people!) because they are likely to have a second burst of thinking. This is really important because it means you will get more thoughts down than just the obvious front-of-mind ones that come out early on. Allow 5-10 minutes for this step.
- Make sure that people don’t put more than one item on a post-it note.
- When everyone has got a pile of sticky notes and generally have run out of steam, ask them to “cluster” their notes as a group into similar themes on the flip chart paper, a bit like playing the card game “Snap”. Things that no-one else has should be included as a cluster of one item.
- Ask the groups to put a ring around each cluster and give it a name that summarises the content.
- Ask each group to feedback on the contents of their clusters, note similarities and differences and agree your next steps, writing them up on the flip chart for everyone to see.

Force-fitting with pictures
Force-fitting is about using dissimilar, or apparently unrelated, objects, elements, or ideas to obtain fresh new possibilities for a challenge or opportunity. You will need some magazines, photos or newspapers for this activity.
It is a very useful and fun-filled method of generating ideas. The idea is to compare the problem with something else that has little or nothing in common and gain new insights as a result.
You can force a relationship between almost anything, and get new insights – companies and whales, management systems and data networks, or your relationship and a hedgehog. Forcing relationships is one of the most powerful ways to develop ways to develop new insights and new solutions.
The following activity – Random Stimulus, a useful way of generating ideas through a selection of objects or cards with pictures – takes about 15 to 20 minutes to complete in total.
It is important to brief delegates to work intuitively through this process rather than over-thinking it. Just follow each of the simple steps outlined here in order.
Force-fitting with pictures step-by-step guide
Step 1: Choose an image from the ones below at random. It really does not matter which one you choose, so just pick one that you think is interesting. This should take you no longer than a few seconds! Do this first before you move to the next steps.
Step 2: Now look at the image that you have selected. Feel free to pull it out so you can have it in front of you as you work. Write down as many interesting words as you can that come to mind when you look at the picture you have selected.
Step 3: Now go back and “force fit” each of your interesting words into a potential solution for your challenge. If you have a negative word, turn it into a positive solution. Do this for every word on your list. You don’t have to work through the list in order – if you get stuck on a word, do another one and then come back to it when you’re ready. Don’t forget – premature evaluation stifles creativity. Just write stuff down without judging anything. You will have the opportunity to go back and select what you want / don’t want to use later.
Step 4: Look at your outputs from this activity and highlight the things that resonate with you in terms of making progress with your challenge.
SCAMPER
The SCAMPER technique is based very simply on the idea that anything new is actually a modification of existing old things around us.
SCAMPER was first introduced by Bob Eberle to address targeted questions that help solve problems or ignite creativity during creative meetings.
The name SCAMPER is acronym for seven thinking activities: (S) substitute, (C) combine, (A) adapt, (M) modify, (P) put to another use, (E) eliminate and (R) reverse. These keywords represent the necessary questions addressed during the creative thinking meeting. Ask you delegates to work through each one.
- S—Substitute (e.g., components, materials, people)
- C—Combine (e.g., mix, combine with other assemblies or services, integrate)
- A—Adapt (e.g., alter, change function, use part of another element)
- M—Magnify/Modify (e.g., increase or reduce in scale, change shape, modify attributes)
- P—Put to other uses
- E—Eliminate (e.g., remove elements, simplify, reduce to core functionality)
- R—Rearrange/Reverse (e.g., turn inside out or upside down)
Moving forward – Idea development
The objective of this session is to select the most useful or interesting ideas that you have come up with in the earlier idea generation activities, and shape them into a useful solution.
Suggested creative techniques for Moving forward – Idea development:
Quick sort
This is a useful exercise to help your delegates to quickly prioritise their ideas as a team.
- Ask delegates to use the grid shown here to plot their ideas, using sticky notes/
- They should then write a question for each of their ‘yes’ and perhaps some of your ‘maybe’ items that begins with the words ‘How could we …?’
- Then ask them to work on each of their questions, capturing their work a flipchart.
Sticky dot voting
Sticky dot voting is a quick, widely used voting method. Once all the ideas are on display give each group member a number of sticky dots (for example 5 each) to ‘vote’ for their favourite solution or preferred option. The number of sticky dots can vary according to what you think will work.
- Give everyone a few minutes of quiet planning time so that they can privately work out their distribution of votes.
- They may distribute their votes as they wish, for example: 2 or 3 on one idea, one each on a couple of others, all on one idea or one each on a whole series of ideas.
- To minimise the risk of people being influenced by one another’s votes, no votes are placed until everyone is ready. When everyone is finished deciding, they go up to the display and place their votes by sticking dots beside the items of their choice.
- As facilitator, lead a discussion on the vote pattern, and help the group to translate it into a shortlist for further development.
Once your delegates have selected their most promising ideas, choose from these creative problem solving techniques to help your group develop their thinking.
Assumption surfacing
Assumption surfacing is all about making underlying assumptions more visible.
- Ask the group to identify the key choices they have made, thinking about what assumptions have guided these choices and why they feel they are appropriate.
- Delegates should list the assumptions, and then add in a possible counter-assumption for each one.
- They should then work down the list and delete any assumption / counter assumption pairs that do not materially affect the outcome of the choice.
- Finally, ask delegates to reflect on the remaining assumptions, consider how these assumptions potentially impact their thinking and whether anything needs to be done as a result.
5Ws and H
The words who, why, what, where, when, how are known as 5Ws and H, or Kipling’s list.
They provide a powerful checklist for imagination or enquiry that is simple enough to prompt thinking but not get in the way.
Ask delegates to:
- Create a list of key questions relating to their challenge, using 5Ws and H as prompts.
- Then ask them to answer of their questions as a way of info gathering and solution-finding for their challenge.
Force field analysis
Force field analysis represents the opposing driving and restraining forces in situation.
For example, it can help to map out the factors involved in a problematic situation at the problem exploration stage, or to understand factors likely to help or hinder the action planning and implementation stages.
The process is as follows:
- Delegates identify a list of the driving and restraining forces and discuss their perceptions of them.
- All the driving forces are arrows propelling the situation, and all the restraining forces are arrows that push back against the direction of the current situation.
- Delegates can use arrow thickness to indicate strength of the force, and arrow lengths to indicate either how difficult the force would be to modify, although these elements are optional.
- Delegates can then use the diagrams to generate ideas around possible ways to move in the desired direction by finding ways to remove the restraining forces and by increasing the driving forces.
Wizard of Oz prototyping
In the classic story of the Wizard of Oz, Dorothy and her friends go to see the Great and Powerful Wizard of Oz only to discover that he’s a fraud with no real magic.
Wizard of Oz Prototyping means creating a user experience that looks and feels very realistic, but is an illusion created to test an idea and generate a lot of really useful feedback very quickly and early on in your design process. The approach also means that you avoid incurring the cost of having to build the real solution.
In the workshop, ask delegates to consider how they could create a Wizard of Oz prototype through rough design sketches, lego or modelling clay.
Action Planning
I’m sure that many of us have been to meetings or events that have been interesting and maybe even fun at the time, but quickly forgotten due to lack of follow up or commitment to take action once the workshop is over.
The action planning phase is an essential part of mobilising the thinking from the workshop into meaningful, pragmatic activity and progress in the organisation. Getting commitment to deliver specific actions within agreed timescales from individuals at the workshop is as essential part of any event.
Suggested creative technique for Action Planning:
Blockbusters
You may remember the 80s quiz show called Blockbusters? Teenage contestants had to get from one side of the board to the other by answering questions.
This technique is based on a similar (sort of!) principle, and it is useful for action planning and helping delegates to visualise moving from where they are now to where they want to be.
- First ask delegates to write down the key aspects of where they are now on sticky notes (one item per sticky note) and put them down the left-hand side of a piece of flipchart paper, landscape.
- Then delegates are to do the same for the key aspects of where they would like to be, this time placing the sticky notes on the right-hand side of the paper, each one aligned to a relevant note on the left-hand side. For example, of they have a sticky note that says ‘struggling for sales’ on the left, they might have one that says ‘increase turnover by 35%’ on the right, both positioned level with each other.
- The final step is for delegates to fill in the space between with the 5 key actions for each item that will get them from where they are now to where they want to be. These can be different and separate actions, and don’t have to be in chronological order.
- You can ask delegates to add in target timescales and owners for each action as well.
Review, feedback and close
At the end of the day, it’s essential to bring everything together, review the progress and thank attendees.
It’s also a great opportunity to gain some feedback on the participants’ experience of the session.
Suggested creative technique for Review, feedback and close:
Goldfish Bowl
The general idea of this technique is that a small group (the core) is the focus of the wider group. The small group discusses while the rest of the participants sit around the outside and observe without interrupting. Facilitation is focused on the core group discussion.
A variation is to invite people from the outside group to ‘jump in’ and replace a member of the core group. It sounds a bit odd on paper, but it works very well and can be great fun.
Sometimes people in the core group are quite pleased to be ‘relieved’ of their duties!
In smaller events, it is also a good idea to make it a game. Make sure that everyone jumps into the core group at least once.
This can really help people focus on active listening, and on building on each other’s points.
Often the best way to brief this in is by demonstrating it with a willing volunteer.
Next Steps
For more facilitation tips, techniques and ideas, have a look at my articles here:
How to design a virtual innovation sprint
How to facilitate a virtual brainstorming session
How to facilitate a goal setting workshop
I’d love to hear from you, whether you’re facilitating your own creative problem solving workshops, or would like some help from us to design and facilitate them for you. I hope you’ve found this article helpful. If you’d like to join my free, private Facebook group, Idea Time for Workshop Facilitators, for even more ideas and resources, please do come and join us.